1. Arduino Nano (small enough)
2. Wires
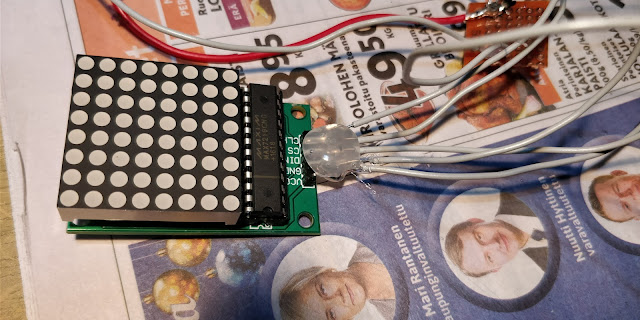
3. LCD Matrix
4. Buttons
5. Power (9v battery case)
6. Led lights
7. Buzzer
8. Resistors
I wanted the spaceship to have cool blinking led lights, play some audio and also something to "toggle". I decided to do the toggle with button and LCD matrix. Project started by trying the Tone library on my Arduino Uno as it is easier to connect cables in it. I found some cool star wars songs for the tone library and decided to use "the cantina song" as my space ship sound. I have explained how to use the tone library in the previous post, but basically it is just like this:
tone(pin, frequency, duration)
I found Star Wars Cantina song from Google Docs file someone had uploaded so I decided to upload it to GitHub, find the song here: https://github.com/shnigi/arduino-space-ship/blob/master/Star_wars_cantina_song.ino
After checking with Arduino Uno that my program works I started to assemble everything. First I had to solder those small pins on the Arduino Nano board. I had to be very careful not to overheat the pins as it can break the whole board.
Then I connected LCD matrix
 |
| Soldering station. |
byte ALL[8]={B11111111,B11111111,B11111111,B11111111,B11111111,B11111111,B11111111,B11111111};
void writeMatrixAll() {
for(int i=0; i<8; i++){
lc.setRow(0,i,0);// this is for blank
}
for (int i=0; i<8; i++){
lc.setRow(0,i,ALL[i]);
}
}
You define which leds on each row should be turned on, then clear the display first and after that just loop through all the rows and turn on lights.
I wanted the space rocket to have 9V battery as its power source since its pretty easy to find such batteries. I also happened to own a 9v battery case with proper wiring and a button to turn on or off.
Arduino Nano can be powered with 9V battery by connecting the cables to Ground and VIN = Voltage In. I also added a button to control the led matrix. Because Arduino is only a stupid circuit controller and can basically do only one thing at a time, I created the code so that between the notes I will check if the button variable has changed. Whole code is available on GitHub: https://github.com/shnigi/arduino-space-ship/blob/master/Avaruusraketti.ino
After soldering everything together I added some hot glue to parts which needed more strength.
Also a red led light was put on the top of the soda bottle. After everything was glued and soldered I started to put everything inside the bottle and strenghtened it with a styrofoam support structure.
Buzzer, LCD matrix, button, 9V battery, led light and Arduino Uno inside 1,5 liter plastic bottle. Finally I just taped to bottom back to its place and decided to add some cardboard wings to make it super cool.
The rocket is now assembled and decorated, ready for painting.
And after painting its a nice silver rocket which makes Star Wars sound and has LCD led display!
As you can see the button doesn't work all the time as the variable checking is done between the notes. It is anyway good for a kid =)
Parts: about 20$
Programming: 2-3 hours
Finding tutorials: button and LCD matrix, 6 hours
Source code: https://github.com/shnigi/arduino-space-ship/blob/master/Avaruusraketti.ino


Ei kommentteja:
Lähetä kommentti